The Art of Marble Preservation

Essential Marble Care Guidelines

Proper maintenance ensures your marble surfaces retain their luxurious appearance for generations.

Do's

  • Blot spills immediately
  • Use pH-neutral cleaners
  • Use coasters under glasses
  • Protect Your Marble from Stains and Etching
  • Clean the surface regularly with a neutral marble cleaner

Don'ts

  • Use Harsh Chemicals or Abrasive Cleaners
  • Use abrasive pads
  • Never leave liquids standing
  • Neglect Deep Cleaning or Professional Help

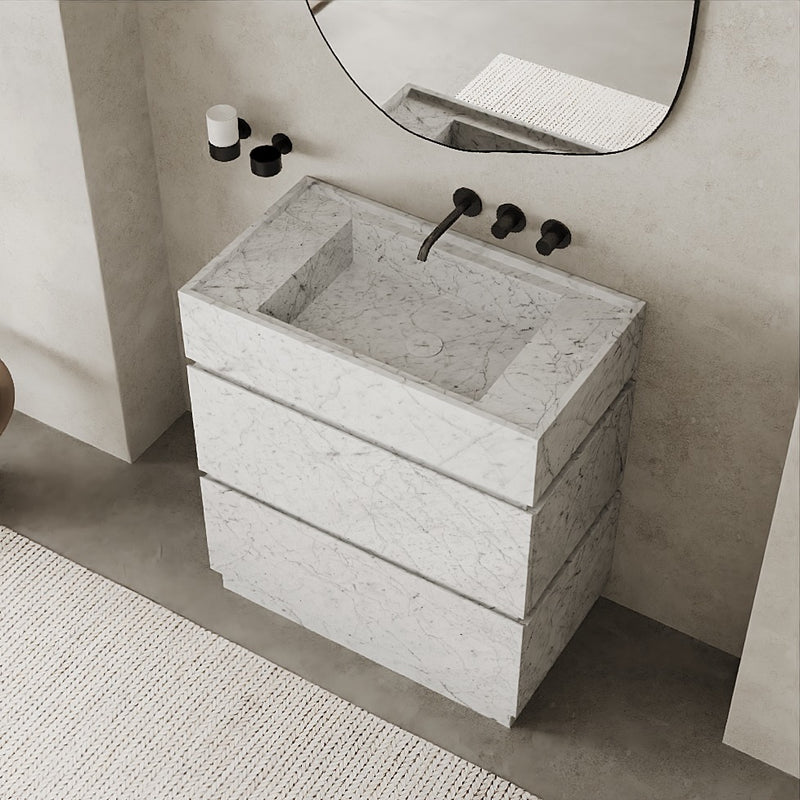
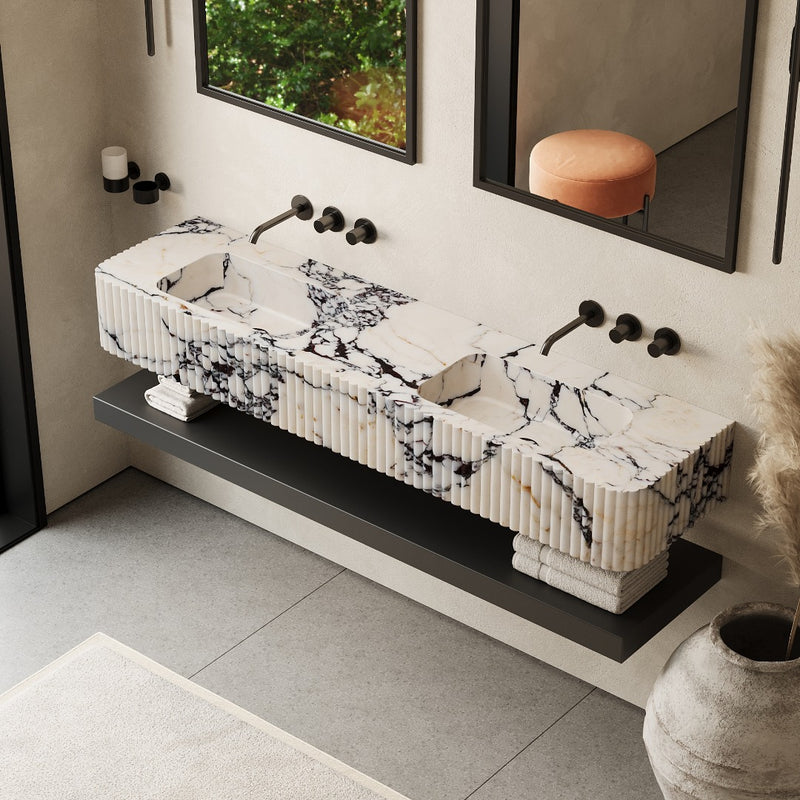
Signature Marble Craftsmanship

Joint Slabs

Joint Slabs

This product is crafted by expertly joining multiple marble slabs, a process that requires precision and skill to ensure seamless alignment of veins and a strong, durable bond. Each slab is carefully selected and fitted together, with special attention to matching patterns and minimizing visible seams. This method allows for larger or more complex designs that wouldn’t be possible with a single block of marble, though it requires advanced craftsmanship to achieve a high-quality, cohesive finish.

Solid Piece Construction

Solid Piece Construction

This product is crafted from a single, solid piece of marble, meaning it has no seams, joints, or glued slabs. Unlike products made from multiple marble pieces joined together, this ensures a flawless, continuous surface with natural veining that flows seamlessly. The result is a more durable, elegant, and high-quality finish.
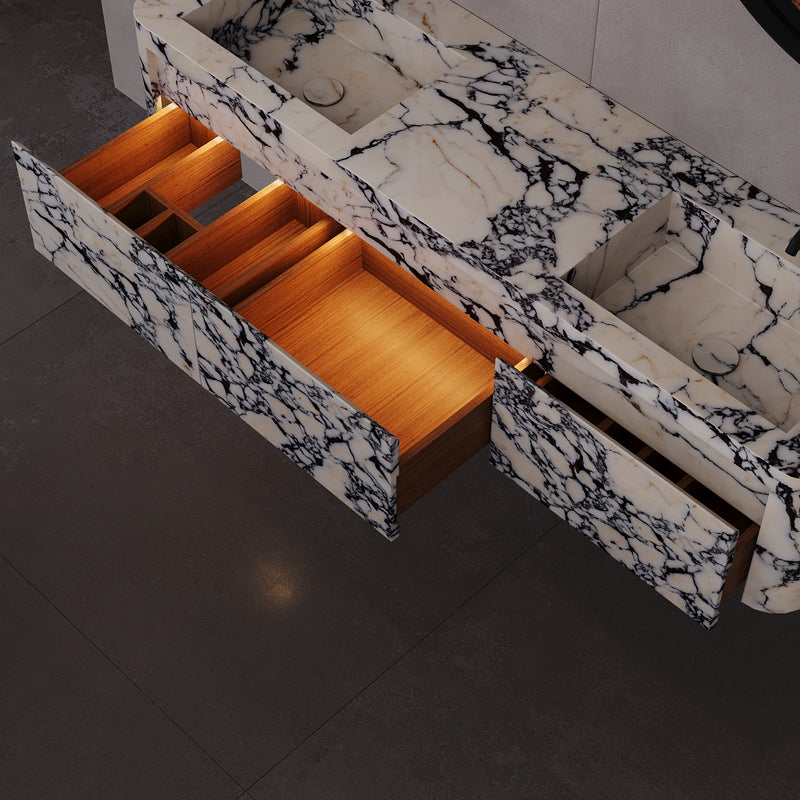
LED Lights

LED Lights

All Our Bathroom Vanities have build in LED Lights therefore an an electrocity outlet is essesntial for installation Make sure to plan for an electrical outlet near the installation area for our Bathroom Vanities equipped with LED lights.

Pre-Installation Tips

Pre-Installation Considerations

  • Structural Support: Marble is heavy, so ensure that the floor and walls can support the weight. Reinforcement may be necessary, especially for wall-mounted vanities or countertops.
  • Moisture Protection: Since bathrooms are high-moisture areas, apply a waterproof membrane to surfaces before installation to prevent water damage.
  • Temperature Acclimation: Allow the marble to adjust to the room’s temperature and humidity for at least 24 hours before installation.

Handling & Preparation

  • Support During Curing: Use temporary supports while the adhesive or mounting system sets.
  • Careful Handling: Always lift marble slabs from the edges, not the center, to prevent racks or breakage.
  • Cutting & Drilling: Use a diamond blade wet saw for cutting and carbide or diamond drill bits for holes (e.g., faucet and plumbing cutouts). Go slow to avoid chipping or cracking.
  • Dry Fitting: Position all pieces before installation to check alignment, veining continuity, and fit.

Installation Tips

For Marble Countertops & Vanities:

  • Leveling: Ensure the base is perfectly level before placing the marble. Use shims if necessary.
  • Adhesive: Use a high-quality stone adhesive, epoxy, or silicone for bonding marble to the base. Avoid cement-based adhesives as they can stain
  • Seaming (if applicable): If joining multiple slabs, use a color-matched epoxy for a near-invisible seam.
  • Sealing: Apply a high-quality marble sealer to protect against moisture and stains.( Our products are pre-sealed but this is for maintenance purposes)

For Marble Sinks & Basins:

  • Undermount Sinks: Secure the sink with brackets and silicone adhesive. Ensure a watertight seal.
  • Vessel Sinks: Ensure proper hole alignment for plumbing and use silicone to prevent leaks.

For Wall-Mounted Marble Units:

  • Anchoring: Use heavy-duty wall anchors or brackets, ensuring they are secured into wall studs or masonry.
  • Support During Curing: Use temporary supports while the adhesive or mounting system sets.